# Setup
# Setup Environment like server-side and Prepare ZFS Pool for Prefill
# Setup Proxmox
## Proxmox Documentation
[https://www.proxmox.com/en/proxmox-virtual-environment/get-started](https://www.proxmox.com/en/proxmox-virtual-environment/get-started)
[https://pve.proxmox.com/pve-docs/chapter-pve-installation.html](https://pve.proxmox.com/pve-docs/chapter-pve-installation.html)
### Enable No-Subscription Repository in web-GUI
node on the left -> Updates -> Repositories.
Disable the enterprise repository and add the No-Subscription repository
Go to the upper menu Update, press Refresh, then Upgrade
## Create ZFS Pool
See page [Create ZFS Pool](https://wiki.hdd-housing.eu/books/setup/page/create-zfs-pool "Create ZFS Pool"), then continue here.
## Permissions
```bash
chown - R 101100:101100 /pool/dataset-versitygw
chown - R 101110:101110 /pool/dataset-syncthing
```
ID 1100 is used for versitygw inside LXC
ID 1110 is used for syncthing inside LXC
# Setup LXC
1. Go to "local" in webgui [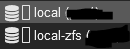](https://wiki.hdd-housing.eu/uploads/images/gallery/2024-04/G7oimage.png)
2. Click on "CT Templates" [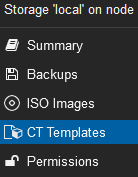](https://wiki.hdd-housing.eu/uploads/images/gallery/2024-04/MuDimage.png)
3. Then click button "Templates"
4. Download Debian 13
5. Click "Create CT" on top richt
[](https://wiki.hdd-housing.eu/uploads/images/gallery/2024-04/Qbzimage.png)
6. Give it Hostname and Password, Make sure Unpriviledged and Nesting is checked
7. Click next, choose the previous downloaded Template
8. Click next, default size 8GB is sufficient
9. Click next, assign 2 Cores
10. Click next, type 2048MiB Memory
11. Click next, choose IP according your network (or DHCP)
12. Click through finish
# Finishing Steps in LXC when using Proxmox
Only applies when using LXC on Proxmox.
## Make ZFS Pool available in LXC
### On Host, LXC must be shutdown
```bash
nano /etc/pve/lxc/100.conf
# add this line, edit poolname if necessary:
mp0: mp=/poolname,/poolname
# mp=/poolname is the mountpoint in LXC
# ,/poolname is from host
```
# Alternative Setups
# Alternative: Setup Pool and Service on plain Debian or Ubuntu
First install Debian or Ubuntu
[https://www.debian.org/CD/netinst/index.en.html](https://www.debian.org/CD/netinst/index.en.html)
[https://ubuntu.com/tutorials/install-ubuntu-desktop#1-overview](https://ubuntu.com/tutorials/install-ubuntu-desktop#1-overview)
Install ZFS
[https://wiki.debian.org/ZFS#Installation](https://wiki.debian.org/ZFS#Installation)
Only user and group ids are different when not using LXC. Simply change them after prefill. Otherwise it will be changed by us and delay deployment (currently no extra fee).
Proceed with [Create ZFS Pool](https://wiki.hdd-housing.eu/books/setup/page/create-zfs-pool "Create ZFS Pool") and following chapters.
# Alternative: Send Empty HDD, We Create The ZFS Pool For You
If you don't want to prefill, just send the empty HDD. We will create the ZFS Pool and services according your needs. No extra handling fee. But be aware, traffic shaping can occure after a certain amount of traffic, plase check [GTC](https://hdd-housing.eu/agb_dsgvo/)
# Create ZFS Pool
## Links
[https://pve.proxmox.com/wiki/ZFS\_on\_Linux](https://pve.proxmox.com/wiki/ZFS_on_Linux)
## Introduction
ZFS pool can be built with `WWN` or `partuuid`, to be able to run the pool even from an USB case if needed. For normal service, `disk ID` is sufficient.
Poolname should be customerid, to make deployment easier. [Poolname can be changed](https://wiki.hdd-housing.eu/books/setup/page/troubleshoot "Poolname can be changed")
## Create a ZFS pool with 2 HDD as mirror
Get WWN from HDD
```bash
ls -l /dev/disk/by-id/
# look for the first target HDD, in our case ata-WDC_WD40EFRX-68WT0N0_WD-WCC4E4DF9NJD -> ../../sdj
# which means the first target HDD is also named sdj
# now look for the WWN which belongs to sdj:
# wwn-0x50014ee20c6324e6 -> ../../sdj
# look for the second target HDD, in our case ata-WDC_WD40EFRX-68WT0N0_WD-WCC4E6FN513C -> ../../sdk
# which means the second target HDD is also named sdk
# now look for the WWN which belongs to sdk:
# wwn-0x50014ee20c629629 -> ../../sdk
```
Create ZFS Pool with WWN from above
```
zpool create -o ashift=12 -O compression=zstd poolname mirror /dev/disk/by-id/wwn-0x50014ee20c6324e6 /dev/disk/by-id/wwn-0x50014ee20c629629
```
## Create ZFS Pool in Raidz1
Get WWN from HDD same as above for each HDD
Create ZFS Pool with WWN from above
```
zpool create -o ashift=12 -O compression=lz4 poolname raidz1 /dev/disk/by-id/wwn-<1> /dev/disk/by-id/wwn-<2> /dev/disk/by-id/wwn-<3>
```
## Create a ZFS pool on a single disk with no data redundancy
Find WWN of the HDD
```
ls -l /dev/disk/by-id/
# look for the first target HDD, in our case ata-WDC_WD40EFRX-68WT0N0_WD-WCC4E4DF9NJD -> ../../sdj
# which means the first target HDD is also named sdj
# now look for the WWN which belongs to sdj:
# wwn-0x50014ee20c6324e6 -> ../../sdj
```
Create ZFS Pool with WWN from above
```bash
zpool create -o ashift=12 -O compression=lz4 poolname /dev/disk/by-id/wwn-0x50014ee20c6324e6
```
## Create a ZFS pool on a single disk with 5 partitions for data redundancy
Attention: Very slow performance
```bash
apt install parted
parted /dev/disk/by-id/ata-WDC_WD40EFRX-68WT0N0_WD-WCC4E4DF9NJD mklabel gpt
parted /dev/disk/by-id/ata-WDC_WD40EFRX-68WT0N0_WD-WCC4E4DF9NJD mkpart zfs 0% 20%
parted /dev/disk/by-id/ata-WDC_WD40EFRX-68WT0N0_WD-WCC4E4DF9NJD mkpart zfs 20% 40%
parted /dev/disk/by-id/ata-WDC_WD40EFRX-68WT0N0_WD-WCC4E4DF9NJD mkpart zfs 40% 60%
parted /dev/disk/by-id/ata-WDC_WD40EFRX-68WT0N0_WD-WCC4E4DF9NJD mkpart zfs 60% 80%
parted /dev/disk/by-id/ata-WDC_WD40EFRX-68WT0N0_WD-WCC4E4DF9NJD mkpart zfs 80% 100%
```
Find the letter of the disk
```bash
ls -l /dev/disk/by-id/ata-WDC_WD40EFRX-68WT0N0_WD-WCC4E4DF9NJD
```
Result
```bash
/dev/disk/by-id/ata-WDC_WD40EFRX-68WT0N0_WD-WCC4E4DF9NJD -> ../../sdh
```
Find all Partuuid of sdh
```bash
ls -l /dev/disk/by-partuuid/ | grep sdh
```
Result (just one displayed as example)
```bash
2c49c49f-4221-324e-afca-23bedbb06677 -> ../../sdh1 #2c49c49f-4221-324e-afca-23bedbb06677 is the partuuid1
```
Create ZFS pool (use all 5 partuuid)
```bash
zpool create -o ashift=12 -O compression=lz4 poolname raidz1 /dev/disk/by-partuuid/ /dev/disk/by-partuuid/ ... /dev/disk/by-partuuid/
```
# Install VersityGW
[https://github.com/versity/versitygw](https://github.com/versity/versitygw "https://github.com/versity/versitygw")
```
wget https://github.com/versity/versitygw/releases/download/v1.0.20/versitygw_1.0.20_linux_amd64.deb
wget https://github.com/versity/versitygw/releases/download/v1.0.20/checksums.txt
sha256sum -c checksums.txt --ignore-missing
dpkg -i ./versitygw_*.deb
```
## Create user and Service
```
useradd -m -s /bin/bash -d /poolname/versitygw/home -u 1100 -g 1100 versitygw
echo "versitygw:$(openssl rand -base64 100 | tr -d '=+/\n\r' | cut -c 1-70)" | chpasswd
```
Edit file:
```
nano /etc/versitygw.d/versitygw.conf
```
Paste content:
```bash
VGW_BACKEND=posix
# When VGW_BACKEND is posix or scoutfs, VGW_BACKEND_ARG must be defined
# as the the top level directory for the gateway.
# All sub directories of the top level directory are treated as buckets,
# and all files/directories below the "bucket directory" are treated as
# the objects. The object name is split on "/" separator to translate
# to posix storage.
# For example:
# (VGW_BACKEND_ARG) top level: /mnt/fs/gwroot
# bucket: mybucket
# object: a/b/c/myobject
# will be translated into the file /mnt/fs/gwroot/mybucket/a/b/c/myobject
VGW_BACKEND_ARG=/poolname/versitygw/buckets
ROOT_ACCESS_KEY_ID=
ROOT_SECRET_ACCESS_KEY=
VGW_PORT=:7070
VGW_ADMIN_PORT=:17070
VGW_IAM_DIR=/poolname/versitygw/accounts
```
## Usage
```
access=
secret=
port=17070
# Create user
versitygw admin -a $access -s $secret -er http://127.0.0.1:$port create-user -a -s -r -ui -gi
#user role: 'user', 'admin', 'userplus' (userplus is able to create buckets, user not)
#ui and gi are optional
# Delete user
versitygw admin -a $access -s $secret -er http://127.0.0.1:$port delete-user -a
# List users
versitygw admin -a $access -s $secret -er http://127.0.0.1:$port list-users
# Change Bucket Owner
versitygw admin -a $access -s $secret -er http://127.0.0.1:$port change-bucket-owner -b -o
# List Buckets and Owners
versitygw admin -a $access -s $secret -er http://127.0.0.1:$port list-buckets
```
## Update Script
```
#!/bin/bash
v=$(curl -s https://api.github.com/repos/versity/versitygw/releases/latest | grep '"tag_name":' | sed -E 's/.*"([^"]+)".*/\1/')
wget "https://github.com/versity/versitygw/releases/download/${v}/versitygw_${v:1}_linux_amd64.deb"
wget "https://github.com/versity/versitygw/releases/download/${v}/checksums.txt"
sha256sum -c checksums.txt --ignore-missing
if [ $? == 0 ]
then
rm checksums.txt
read -p "Do you want to install $v? (y/N) " confirm
[[ "$confirm" != "y" ]] && exit 0
dpkg -i ./versitygw_${v:1}_linux_amd64.deb
systemctl daemon-reload
systemctl restart versitygw@*
sleep 3
systemctl status versitygw@*
fi
```
# Install Syncthing
[https://apt.syncthing.net/](https://apt.syncthing.net/)
```
apt install -y curl apt-transport-https ca-certificates
curl -L -o /etc/apt/keyrings/syncthing-archive-keyring.gpg https://syncthing.net/release-key.gpg
echo "deb [signed-by=/etc/apt/keyrings/syncthing-archive-keyring.gpg] https://apt.syncthing.net/ syncthing stable-v2" | tee /etc/apt/sources.list.d/syncthing.list
apt update
apt install -y syncthing
```
### Create User Syncthing with Home Folder on HDD-Housing Storage
```
useradd -m -s /bin/bash -d /poolname/syncthing -u 1110 -g 1110 syncthing
echo "syncthing:$(openssl rand -base64 100 | tr -d '=+/\n\r' | cut -c 1-70)" | chpasswd
systemctl enable --now syncthing@syncthing
systemctl status syncthing@syncthing # shows used ip and port
```
Replace "poolname" with your actual poolname.
# Install Minio S3 Storage Server on Debian/Ubuntu
## Download binary from Github
[https://github.com/minio/minio](https://github.com/minio/minio "https://github.com/minio/minio")
```bash
mkdir /opt/minio_binary
cd /opt/minio_binary
wget https://dl.min.io/server/minio/release/linux-amd64/minio
chmod +x minio
./minio server /data
```
## Create user minio
```bash
# If on unpriviledged Proxmox LXC
adduser minio --uid 1000
# Otherwise
adduser minio --uid 101000
```
If on unpriviledged Proxmox LXC, set permissions on host for minio dataset:
```bash
chown 101000:101000 /hddhousing/minio
```
## Create self signed certificate and show fingerprint
Download certgen [https://github.com/minio/certgen](https://github.com/minio/certgen)
```bash
cd /opt/minio_binary
wget https://github.com/minio/certgen/releases/latest/download/certgen-linux-amd64
./certgen-linux-amd64 -host "192.168.0.24" # change ip as needed
mv private.key /home/minio/.minio/certs/
mv public.crt /home/minio/.minio/certs/
chown minio:minio /home/minio/.minio/certs/*
cat /home/minio/.minio/certs/public.crt | openssl x509 -fingerprint -sha256 -noout
# sha256 Fingerprint=EC:F9:1C:A3:8D:84:51:9F:C6:0A:ED:CB:C0:22:3F:8C:94:44:1F:89:21:8F:54:80:40:65:EE:6E:AB:11:30:5F
```
## Create systemd service
```bash
nano /etc/systemd/system/minio.service
```
With content:
```bash
[Unit]
Description=Minio HDD-Housing
After=network.target
[Service]
Environment="MINIO_ROOT_USER=vfgergreadgfg"
Environment="MINIO_ROOT_PASSWORD=dfhrththwwgfsdadfrergetgtrhfdsb"
User=minio
ExecStart=/opt/minio_binary/minio server --anonymous /hddhousingpool
[Install]
WantedBy=multi-user.target
```
Reload systemd and start minio
```bash
systemctl daemon-reload
systemctl enable --now minio.service
systemctl status minio.service
```
# Install Proxmox Backup Server 4 on Debian 13 Trixie
First install Debian on [LXC](https://wiki.hdd-housing.eu/books/setup/page/setup-lxc "Setup LXC") or native
## Install Proxmox Backup Server 4 on Debian 13 Trixie
[https://pbs.proxmox.com/docs/installation.html#install-proxmox-backup-server-on-debianasd](https://pbs.proxmox.com/docs/installation.html#install-proxmox-backup-server-on-debianasd)
Download Proxmox Sign Key
```
wget https://enterprise.proxmox.com/debian/proxmox-archive-keyring-trixie.gpg -O /usr/share/keyrings/proxmox-archive-keyring.gpg
```
Verify the SHA256 checksum
```bash
sha256sum /usr/share/keyrings/proxmox-archive-keyring.gpg
136673be77aba35dcce385b28737689ad64fd785a797e57897589aed08db6e45 /usr/share/keyrings/proxmox-archive-keyring.gpg
```
Add Proxmox Backup No-Subscription Repository
```bash
nano /etc/apt/sources.list.d/proxmox-pbs.sources
```
Paste content:
```bash
Types: deb
URIs: http://download.proxmox.com/debian/pbs
Suites: trixie
Components: pbs-no-subscription
Signed-By: /usr/share/keyrings/proxmox-archive-keyring.gpg
```
```bash
apt update
apt dist-upgrade
apt install proxmox-backup-server
```
## Next Steps
- Set Timezone in Webgui
- Disable Enterprise Repository in Webgui or upload your subscription key
- Add HDD-Housing S3 Storage
# Troubleshoot
## Change Pool to use WWN
```bash
zpool export poolname ; sleep 5 ; zpool import -d /dev/disk/by-id poolname ; sleep 5 ; zpool list -v poolname
```
## Change Poolname
```bash
zpool export poolname
zpool import poolname newpoolname
```
# Install Minio AIStor
[https://www.min.io/download](https://www.min.io/download)
## Install/Update Script
```
#!/bin/bash
if [ $# -eq 0 ]; then echo "Filename missing, Example: minio_20251220045837.0.0_amd64.deb"; exit 0; fi
curl https://dl.min.io/aistor/minio/release/linux-amd64/$@ -o ./$@
curl https://dl.min.io/aistor/minio/release/linux-amd64/$@.sha256sum -o ./$@.sha256sum
sha256sum -c $@.sha256sum
if [ $? == 0 ]
then
echo "Checksum ok, updating minio"
dpkg -i ./$@
systemctl daemon-reload
systemctl restart minio
sleep 3
systemctl status minio
else
echo "Checksum mismatch, aborted!"
fi
```
How to use the script